Overview
An email workflow is series of automated emails that will be sent — or not — based on a person's behavior or criteria. With workflows, you can trigger emails or events based on your recipients' actions. This allows you to send the right message to the right person at the right time.
Workflows can be set up in two ways; they can be part of a campaign or a published workflow can be added to an existing campaign. In either case, administrator access is required for the initial setup.
Most workflows are based on action triggers, such as clicking on a link or submitting a form. In these cases, emails in the workflow are triggered automatically when your contact clicks on a previously-sent email, submits a form, or takes another specified action within the workflow. Action-triggered workflows calculate the time sent of each email based on the time sent of the previous email in the series. Workflows use your operating system time when calculating times. So you don't need to do anything to schedule them! You will need to activate the workflow to get it started.
FYI: Zift services processes workflows every three hours. Any steps less than three hours between steps will have adverse results and is not recommended.
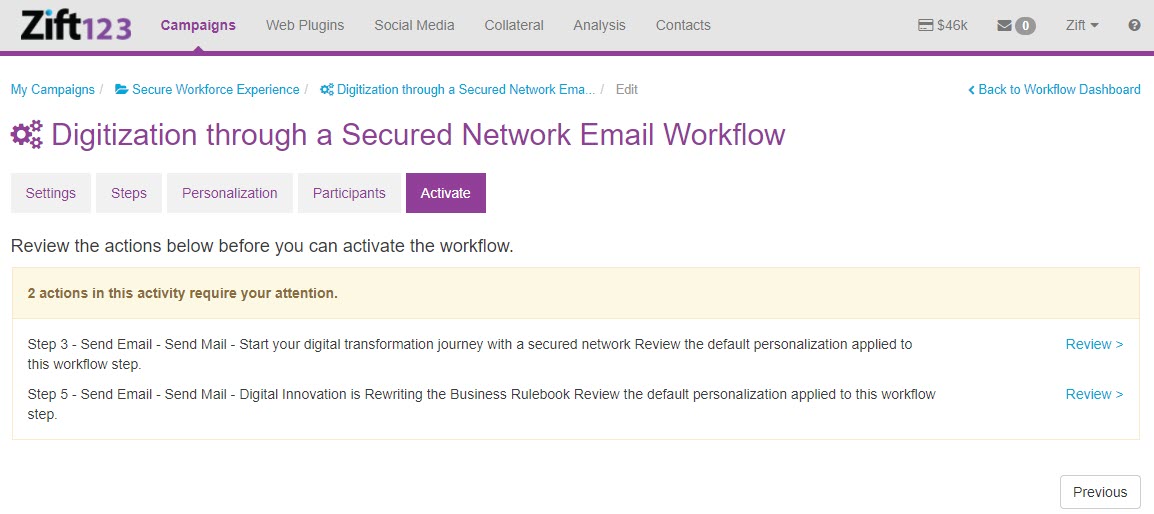
The final step to creating a workflow is to Activate it. All actions in the workflow must be saved, to Activate the workflow.
Prerequisites
You should be familiar with the following topics before continuing:
- Zift123 Username
- Zift123 Password
How to Activate the Workflow
Do the following to activate the workflow:
- Access the Workflow Wizard for your campaign.
- Select the Activate tab.

- Select Review to complete all outstanding tasks. If all have tasks have been completed you will not see the Review option.
- Select Activate. You will land on the workflow Activity Dashboard. Note both the green On/Off button and the green gear turning. Use the On/Off button to pause the workflow. You can activate the workflow with the On/Off button if it has been paused.