Overview
Staying in touch with your customers is an important part of any marketing plan. The contact database is made up of individual contacts that represent an individual person or business and contains specific contact information. This information includes each contact's name, address, city, state, and phone number.
With Zift123, you can target specific segments of your existing contacts to create contact lists. Once your list is built, you can deliver content using campaign activities such as email and print media. Created lists are available for reuse and may be used as the basis for new lists.
You can configure your account so that only contacts who have been marked as Authorized to receive communications will receive emails you send from Zift123. This is a best practice for creating clean GDPR compliant mailing lists. Learn more about Sender Permissions and Best Practices for Contact Lists.
Prerequisites
You should be familiar with the following topics before continuing:
- Zift123 Username
- Zift123 Password

How to Personalize Your Confirmation Email
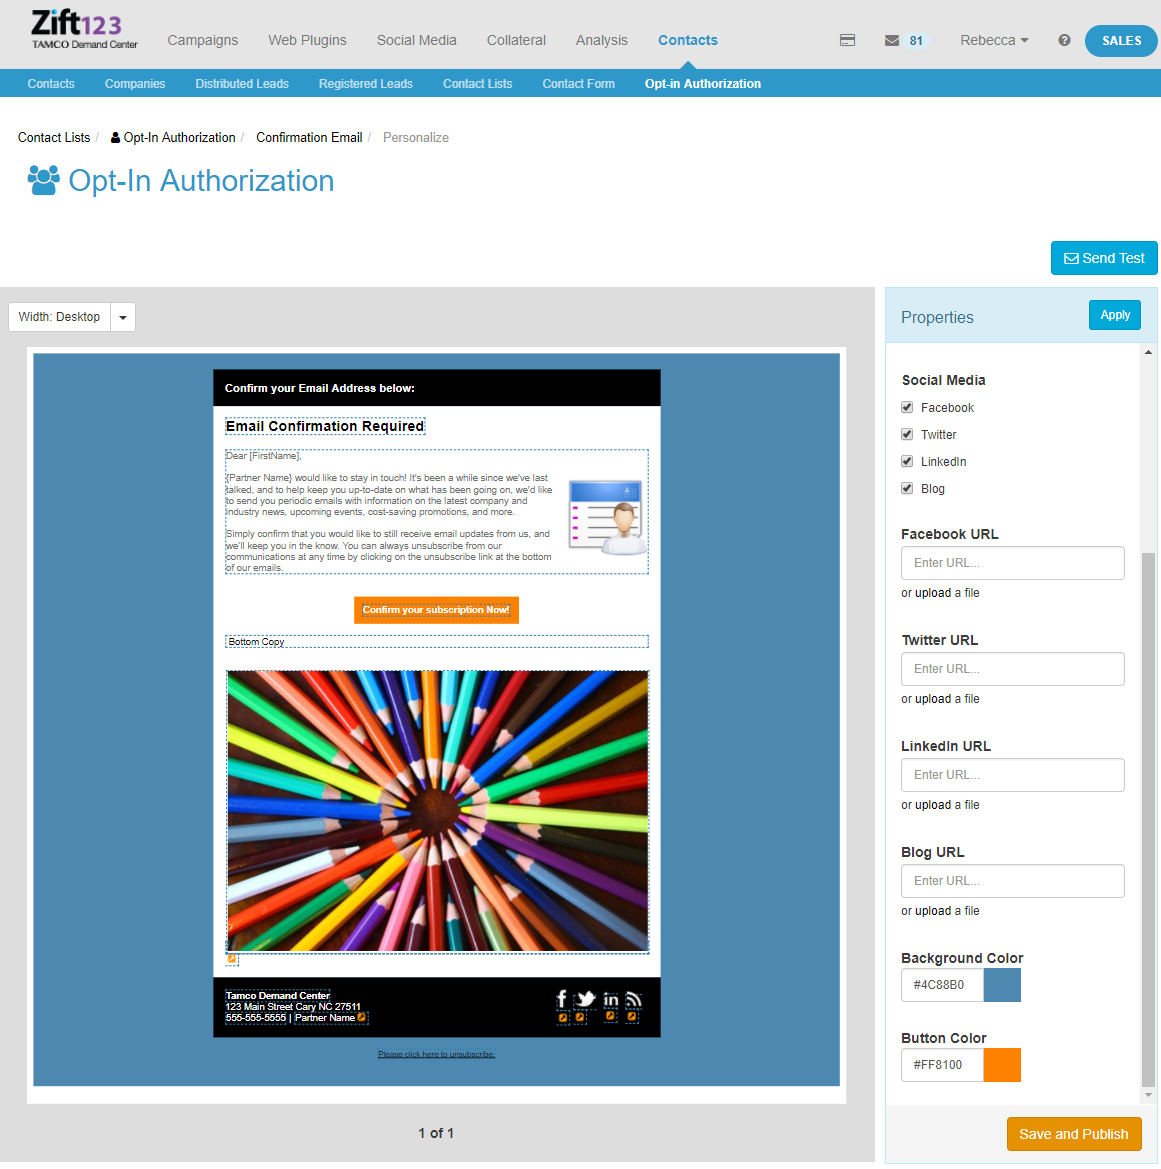
- From Contact Lists > Opt-in Confirmations > Confirmation Email, select Personalize.
- Edit any fields inside the dotted-line boxes by clicking on the locations. Areas that can be edited vary by partner. Here are a few examples: Logo, Value Proposition, Company Name, Company Address, Company Phone Number, and Company Website URL.
- Edit or add items in the Properties box such as Social Accounts, Social Account URL, Terms of Use statements, Privacy Statement, button colors, and data privacy policy are examples that you may find here. These options vary based on need.
- Select Apply to see the changes.
- Select Save and Publish.
- Select Send Test. Once everything looks good, send a Test email to yourself. This gives you the opportunity to see how your users will see your email.
Tip: (Optional) From Settings > Email Footer > On. You can add a Merge Field, Opt-In Link that will appear in the footer. It works much like an unsubscribe link.