Overview
A campaign is a collection of marketing activities that includes emails, email workflows, web plugins, print media, online ad campaigns, or any combination of the above. You can use supplier-provided campaigns or create your own. By creating campaigns, you will be able to gather data in one place for all the marketing activity around a specific product or service.
The more you personalize your content, the more likely the recipients are to respond. In the majority of email templates, you have the ability to edit, revise, and personalize emails with your business information and other preferences. Please note that personalization options are not available in every template. Once you have edited details and personalized your email, you have the ability to preview your changes in desktop, mobile, or tablet view. Once everything looks good, send a Test email to yourself. This gives you the opportunity to see how your users will see your email.
Prerequisites
You should be familiar with the following topics before continuing:
- Zift123 Username
- Zift123 Password
Content
The following will help with personalizing your emails:
- How to Personalize your Campaign Activities
- How to Resize an image
- More Tips to Personalize your Campaign Activities
How to Personalize your Emails, Ads, Print Media, Web Plugins, Landing and Confirmation Pages, or Other Campaign Activities
Important: When personalizing content, you may have multiple pages to personalize. The pages are available for editing using sub-tabs. 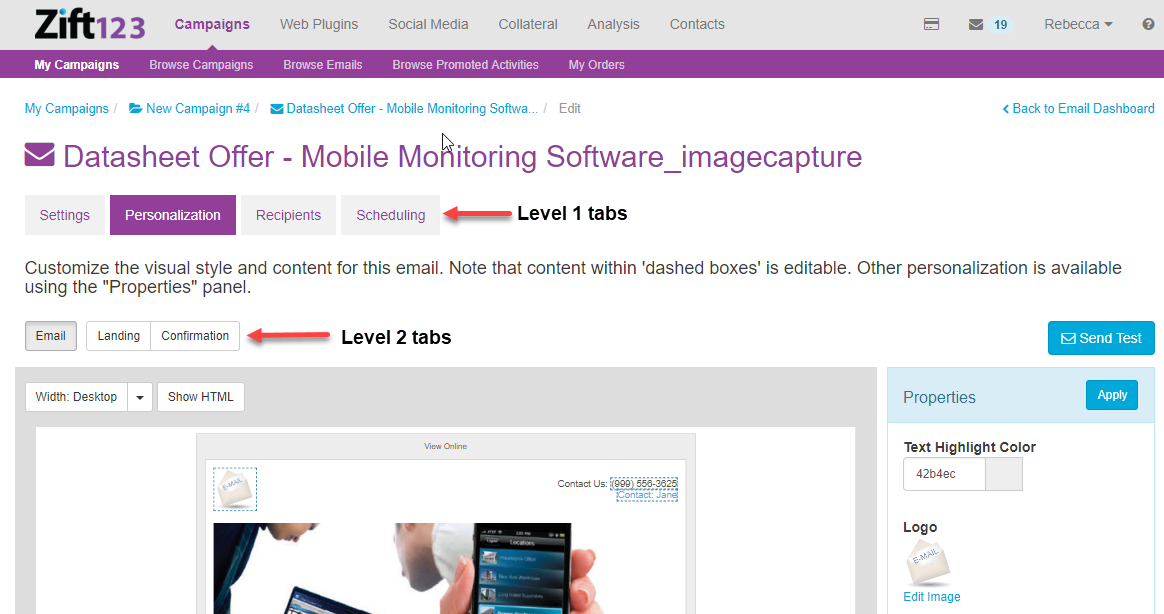
Important:Save each page before moving to the next step. 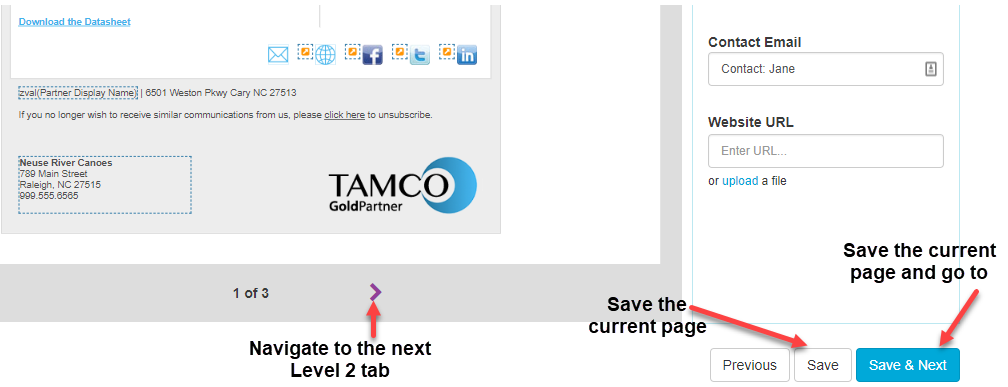
- From Campaigns > My Campaigns, click on the campaign title to select it. You will land on the Campaign Dashboard.
- Select an Activity that has not been sent to personalize. You will land on the Activity Dashboard.
- Select Edit to access the Personalization tab.
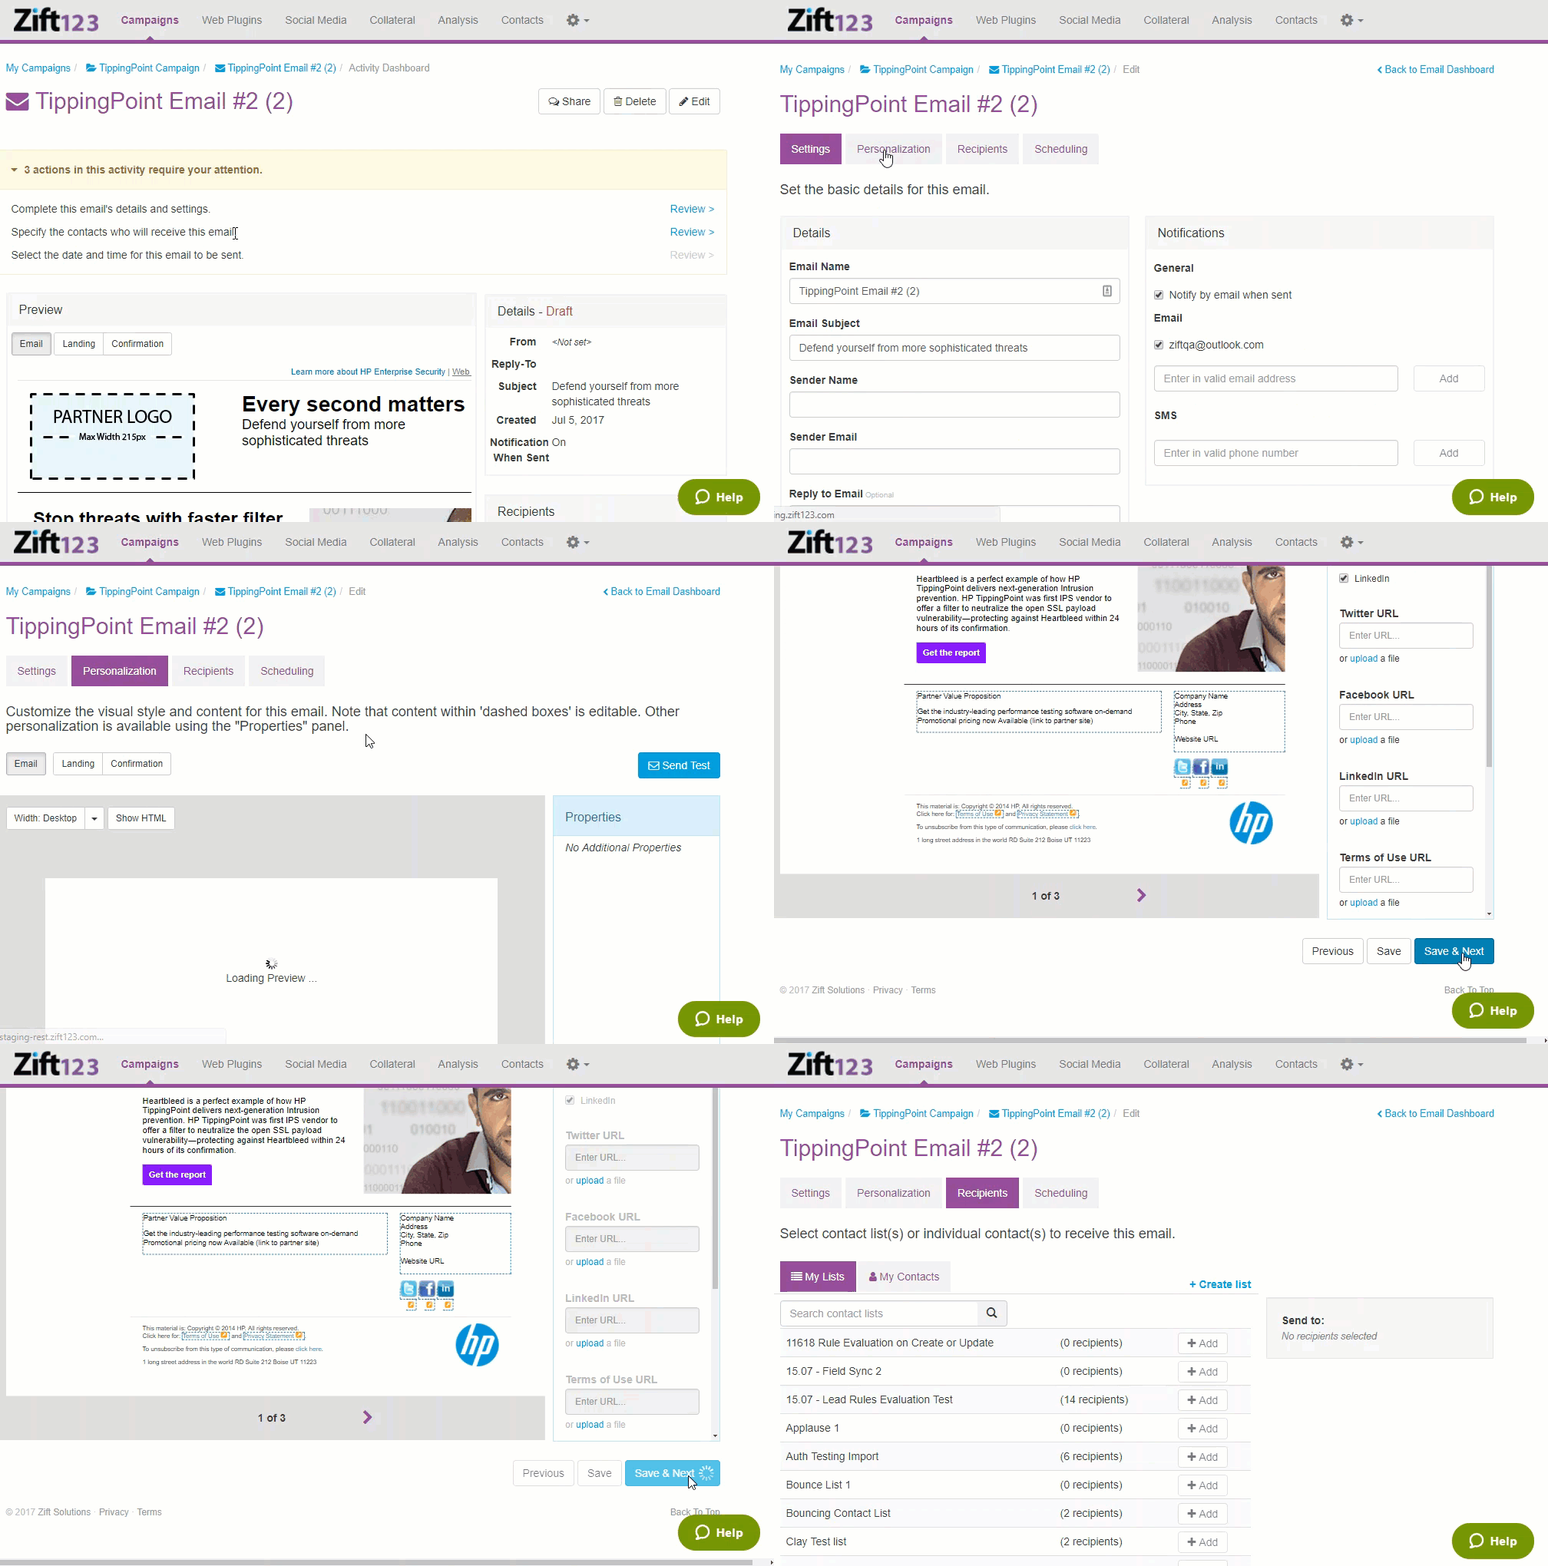
- Select Personalization.
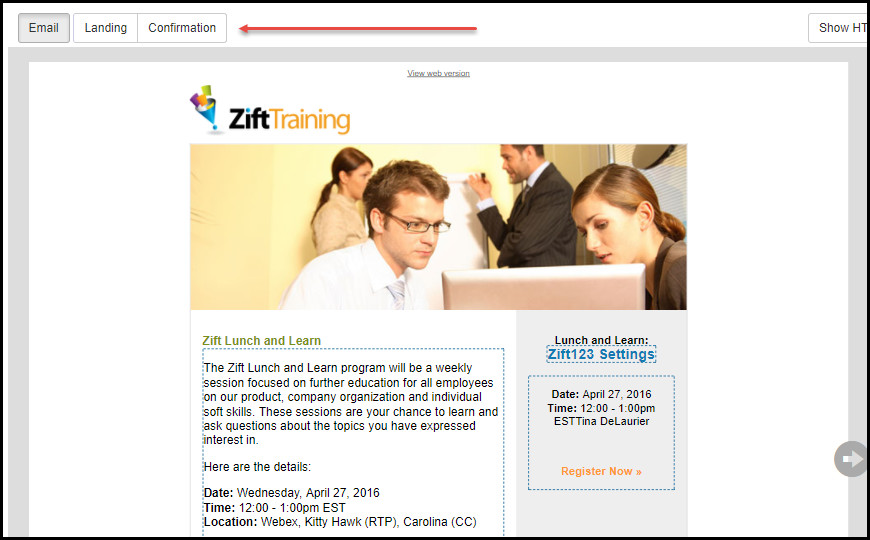
- Select the tab to personalize. Options might include Email, Landing, and Confirmation for example.
- Edit any fields inside of dotted-line boxes. Areas that can be edited vary by partner. Here are a few examples: Logo, Value Proposition, Company Name, Company Address, Company Phone Number, and Company Website URL.
- Edit or add items in the Properties box such as Social Accounts, Social Account URL, Terms of Use statements, Privacy Statement, button colors, and data privacy policy are examples that you may find here. These options vary based on need.
- Select Apply to see the changes.
- Select Save.
- Select Send Test. Once everything looks good, send a Test email to yourself. This gives you the opportunity to see how your users will see your email.
- After personalizing the campaign activity, select the campaign breadcrumb hyperlink to return to the Campaign Dashboard to complete other activities in the campaign. If no other activities need to be personalized, continue through to Add Recipients to Your Campaign.
How to Resize Your Image
- From Campaigns > My Campaigns, select a campaign from your list of campaigns.
- Select the campaign title. You will land on the Campaign Dashboard.
- Add a new Activity or select an existing Activity you'd like to personalize. You will be on the Activity Dashboard after making your selection.
- Select Personalize or Review the default personalization applied to this activity.
- In the Properties section, elect Edit Image.
- Select to Resize or Crop.
- Move the bar slider to make the image larger or smaller. Alternatively, crop the image.
- Apply the change.
- Save the changes.
- Publish.
More Tips to Personalize your Emails, Landing Pages, or Other Campaign Activities
- Partner Default Fields - Partner Default Fields are the values that Zift123 will apply as the default value for any activity, in any campaign, across the application. Administrators define these fields during system set-up. The ability to save a partner default field value as the new default is available to any user with the Marketing user role. If the field is a partner default field, the option to save as a default will always appear. If the field value is saved as the default, then you will not need to enter the data every time. Once you save a partner default field value as the default, then all subsequently activated activities will default to that value, unless a new value is provided. The Save as Default value only applies to current and future campaign and activity activations. It does not apply to previously activated campaigns or activities. Recent Values allows you to toggle between the default and previously used values or to create new values.
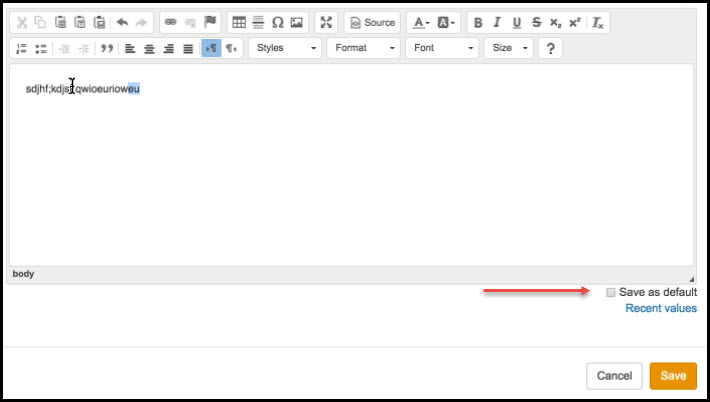 Partner default fields are set per activity, per supplier. They can vary from one supplier to another, from one web plugin to another, and from one email to another. Here are some examples of frequently configured partner default fields:
- Company Logo
- Value Propositions
- Company Contact
- Social Media URLs
- Additional Pages - Your email may have landing and confirmation pages. Your web plugin may have a form or confirmation form. All of these additional pages can be personalized. To edit the additional pages, select Personalize. Click the Landing and/or Confirmation tabs at the top of the activity template.
- Show HTML - Show HTML allows you to make a copy of the raw HTML used to build the email template. You can use the raw HTML to rebuild the email in another tool. You can also rebuild the activity in the Create Your Own Campaign section of the Zift123 account for further personalization.
- Test - Use Test to send out a preview activity before you send an actual campaign out to a contact list. This allows you to see how the activity will look/function once it is sent out to a contact list.
- TEST mailings do no count against your partner credits.
- Subject lines of the mailing will not include TEST.
| Continue Getting Started With Email |